Need help?
Check out our most frequently asked questions or some of our helpful guides.
Frequently asked questions
Having trouble with your connection? Got a question about our services? Start here!
There are lots of reasons why your internet may be running a little slow. Here are two fixes that help solve most issues:
Power Cycling
Power cycling is the best, easiest, and most common fix for spotty or no internet. To get started:
- Switch off your hardware
- Unplug the power cord from the back of your equipment
- Wait 30 seconds — just to make sure any left-over power is used up
- Plug everything back in and turn your hardware on
- Wait for everything to reconnect and get back online before you perform a speed test
Router location and distance
Your router's location can really impact how smooth or reliable your internet service is.
Make sure your router is in an open, central location and not blocked by furniture, walls, or other electronics. Things like baby monitors, microwaves, or even your neighbours' Wi-Fi can also interfere with the strength of your Wi-Fi, so try to avoid those disturbances wherever possible.
Have a device that's particularly important, like in a home office or gaming setup? Try to position your router closer to those key devices, then run speed tests in the rooms where having a good connection is important and adjust your router's location accordingly. Check our guide below for more tips on optimising your Wi-Fi setup.
We're an honest bunch and will always try to let you know when there's an outage impacting your service.
You can find updates on outages in the Buddy Telco app or on our Network page.
If you're having trouble getting back online after an outage, we suggest you perform a power cycle (find instructions in the “Why is my internet slow” FAQ above).
Here are some simple steps to get the most out of your Wi-Fi:
1. Location, location, location!
Where you place the router will heavily impact the quality of your internet connection.
Make sure your router is in a central position and that its signal can reach the rooms you need it to.
2. Open space
Keep your router in an open space and, away from anything that can interfere with the signal — think microwaves, electronics, brick walls, or baby monitors. Avoiding these obstructions will go a long way to ensuring you have a strong Wi-Fi signal.
3. Utilise the 2.4GHz and 5GHz channels
Most routers offer 2 channels: 2.4GHz and 5GHz. Here is an easy summary of their pros and cons.
2.4GHz
- Longer signal range.
- Better at going through objects, like walls or furniture.
- Prone to more congestion (as more devices tend to use 2.4GHz).
- Lower data rate (or speed).
5GHz
- Shorter signal range.
- Worse at going through objects.
- Less prone to congestion.
- Faster data rate (or speed).
Connecting different devices to different channels keep the congestion on each channel to a minimum.
For example, if you have a TV near the router, it's better to use the 5GHz channel and leave the 2.4GHz channel for devices at the other end of the house.
4. Check that your router can do what you're asking it to
Not all routers are made equal, and it's important to understand your household's needs when selecting a router.
If you have a large house with multiple levels or lots of solid brick walls that a signal needs to pass through, then a single router may not be able to reach every corner of the house. You may need to investigate a mesh router system with multiple points scattered around the house.
If you have a compact apartment, then one router will likely be enough.
Make sure your router is good enough to manage the number of devices using it. Having a 10-year-old router processing a family of 5 streaming and gaming is asking a lot. Think of it like upgrading your old hatchback that barely fits 3 people, to a new minivan that can easily take the family wherever you need to go.
5. Use an Ethernet cable
The best way to improve your speeds is to not use Wi-Fi at all! Instead, use an Ethernet cable to plug your device directly into your router. Your house may even have ethernet ports in different rooms, which will enable direct, speedy connections so long as you connect these ports to your router. This is recommended for functions that need smooth, high-speed connections, such as streaming video calls or online gaming.
Across Australia, there are lots of different ways we have tried to connect to the internet. In the telco industry, we call these “connection types” — each boasting different pros and cons.
For a more detailed look at the different connection types and to identify what type you have, visit our connection types page.
While we're sad to see you go, we understand that sometimes you may need to close your service.
You can close your active service using the Buddy Telco app. All you need to do is open the app and select the service you want to close. From there, find the 'Close your service' button, fill out the necessary details and we'll take care of the rest.
If your service has not been connected yet, you will not be able to close it in the Buddy Telco app. Instead, reach out to our live chat team from Monday to Friday, 11am-7pm (AEST).
If you're having issues, feel free to talk to our live chat team.
The Buddy Telco app makes managing your connection easy. You can do everything from changing your plan, updating your account information, or checking on the status of your service with just a few taps!
Absolutely!
You can pick a different plan within the Buddy Portal and whether you want the plan change to kick in now or after your next invoice.
Remember, if you're upgrading your plan mid-month, you'll be charged the additional cost of the new plan. If you're choosing a lower plan, the new price will kick in at your next invoice.
Yes — but only once your Buddy service is up and running. We'd hate for you to cancel it too early and have no internet!
For a detailed breakdown on your bill, check our bill explainer guide here.
First thing's first, check if there's an outage currently affecting your service in the Buddy Telco app.
If your service is not affected by an outage, try giving your hardware a power cycle.
If that doesn't work, then you'll need to narrow down where the issue is coming from. The two most common culprits are either the NBN equipment or your own, e.g. cables or your router. Here are some things you can try to determine the cause of your issue.
For Fibre to the Node (FTTN) or Fibre to the Building (FTTB) connections
Check the lights of your modem.
If the DSL light is flashing or unlit:
- Try running a spare DSL or phone cable from the wall socket to the modem.
- Plug the modem into any other phone or DSL ports you may have in the property.
If the DSL light is lit up and solid:
- Check that your device settings match our recommended settings.
- If the settings look good, then perform a power cycle.
- If the problem persists, please reach out to our support through live chat.
Learn more about our recommended device settings.
For other connection types (FTTP, HFC, FTTC)
Check the lights on the NBN connection box are behaving normally:
HFC
- The four lights should be lit up and solid.
FTTP
- Power should be solid green.
- Optical should be either flashing or solid green.
- Alarm should be either off or solid green.
- UNI-D should be any combination of flashing or solid and, yellow or green.
FTTC
- Power should be solid blue.
- Link should be solid blue.
- DSL should be solid blue.
- LAN should be flashing or solid blue.
If the lights don't match the above, you can give the NBN connection box a reset by pressing a pin or toothpick in the reset hole on the back for 10 seconds.
Note: If you have a FTTP connection, don't reset the NBN connection box and move on to the next step.
If you're still unsure where the issue may be coming from, you can unplug your router, and plug another device into the NBN box (like a spare router, or computer with an ethernet port). If it can't get a connection, the issue might not be your equipment.
If you're still not having any luck after trying these tips, you can run some tests on the Buddy Telco app and raise a fault. Take a look at our guide on how to raise a fault in the app.
Yes, you can get a Static IP! Add to your service through the Buddy Telco portal. All you need to do is log in to your account, select the "Static IP" bolton under "Advanced", and click "Apply Bolton". The cost will be charged in full on your next invoice.
Unfortunately, we cannot opt a service out of CGNAT without adding a static IP.
Our Perth-based live chat team is available Monday to Friday, 11am-7pm (AEST). If you need help outside of these hours, our customer service chatbot offers a range of self-serve options.
You can also manage your account and service anytime using the Buddy Telco app.
No - Buddy Telco does not charge any cancellation fees nor require any minimum notice period to close your service. While we would be sad to see you go, we understand that life happens and we want to make the process of closing your service as simple as the rest of the Buddy Telco experience. If you cancel your service mid-cycle, we will only charge you for the days you are connected. You can cancel your service in the Buddy Telco app.
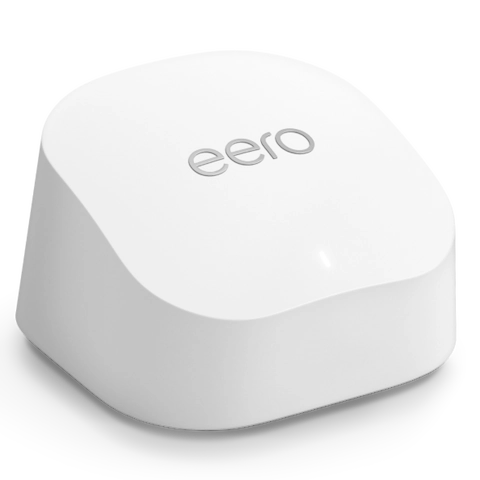
Yes! We offer the eero 6+ which can seamlessly integrate with your Buddy connection. Our eero 6+ routers have a super simple setup — just plug in and get connected!
To purchase an eero 6+ with Buddy, you can select it as an add-on when getting a new Buddy service.
Buddy Telco is Aussie Broadband’s low-cost brand, which is able to offer simple and affordable nbn® internet by operating under a “digital first” model for sales and support (live chat provided by 100% Australian staff based in our Perth support centre).
We're not currently experiencing any major outages or significant local outages. When we are, we will use this page to communicate what is being done.
At Buddy Telco, our promise is to provide you with internet that just works, and to let you know when there is a major outage or significant local outage affecting your service.
When there is an unscheduled major outage or significant local outage, our team will send you an email or SMS with all the relevant details you need to know.
If it is a major outage, we will also provide updates on our Facebook page and our outage webpage.
Our Customer Service LiveChat will be updated with an acknowledgment of the outage, however, please be mindful that our queues will be longer than usual.
We will also let the government, Telecommunications Industry Ombudsman, emergency call services and regulators know of the outage.
Throughout the course of the issue, we will aim to provide updates every 6 hours, for the first 24 hours, or sooner if there is a meaningful change.
And finally, once we have resolved the issue, we will let you know via all the avenues mentioned above.
Throughout the outage, if you have any questions or concerns, feel free to reach out to us via LiveChat on our website.
Please keep in mind that our Customer Service team is likely to be busy and wait times may be longer than normal.
An AVC ID (Access Virtual Circuit Identifier) is a unique 15-character code that identifies your nbn® connection. nbn requires all telcos to collect your AVC ID when you switch providers or take over an existing service. This helps protect your service from being transferred without your permission and ensures we connect the correct service, especially if there are multiple connections at your address.
If you are already with Buddy, you can find your AVC ID in the Buddy Telco app under your active services or on your monthly invoice. It is made up of the letters "AVC" followed by 12 digits, for example "AVC123456789000".
If you are with another provider, check your invoice or online account. It is usually listed near your service address.
If you need help finding your AVC ID, start a live chat.
Getting Started with Buddy Telco
Welcome to Buddy Telco! Here's some important information you should know.
Once we have your order, we'll do all the heavy lifting and start processing your order straight away!
Typically, we see services connect within the hour, but it can take up to 24 hours. We'll let you know (via SMS) once you're ready to go.
- Do NOT disconnect your current connection until your new Buddy Telco service is live and working.
- Make sure your router is in a central and open location.
- Check all your cables are plugged in the right place and fastened securely.
- Ensure your router is up to date on any firmware or software updates.
If you want more tips and tricks for optimising your home network and Wi-Fi, click here.
Yes! Everything will stay the same.
You can find the SSID (network name) and security key (password) on the sticker underneath the router.
It depends! For Fibre to the Premises (FTTP) connections, your wall-mounted NBN Network Termination Device (NTD) will have 4 'UNI-D' ports numbered 1 to 4 on its underside. When your Buddy Telco service is activated, you'll need to plug your router into the correct port to connect. We'll tell you which port to connect to in an SMS once your NBN order is complete. It may be the same port you're already connected to, or a different one.
It's important you don't plug into Buddy's NBN port before you're told your service is active — you don't want to be without internet while waiting for us to connect!
To connect your router to your NBN NTD:
- Unclip the plastic case covering the NTD, with the 'UNI-D' ports located on the underside of the device.
- Plug an ethernet cable into your correctly numbered 'UNI-D' port on the NTD. Note: Make sure you plug into a 'UNI-D' port, not one of the 'UNI-V' ports!
- On your router, insert the other end of the ethernet cable into the port labelled 'WAN'. Check all plugs are secure, and power on both devices.
What can I do in the Buddy Telco app?
As a Buddy customer, you get access to the Buddy Telco app, which allows you to simply take control of your account and service wherever you are.
Your internet is not internet-ing properly — it happens! Luckily, here's everything you need to get back on track in the Buddy Telco app.
Reporting a fault
If something's up, we're here to look into it for you. You can raise a fault ticket in the Buddy Telco app or portal by following these steps:
-
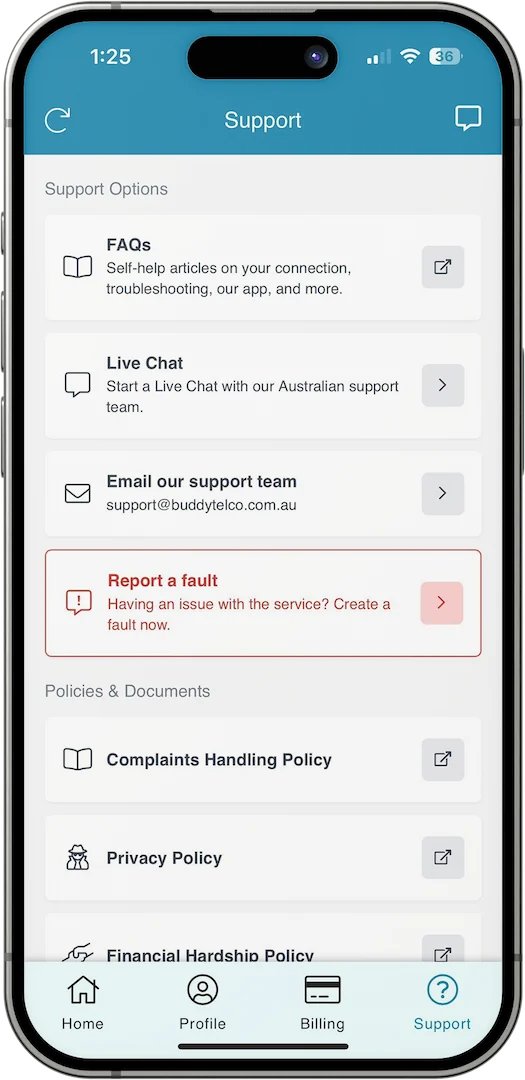
Head to the 'Support' tab on the side or bottom taskbar and click on the Report a fault button. You can get to this from the 'Home' screen too, by selecting the arrow ( > ) next to the Faults option under the 'Tools' section.
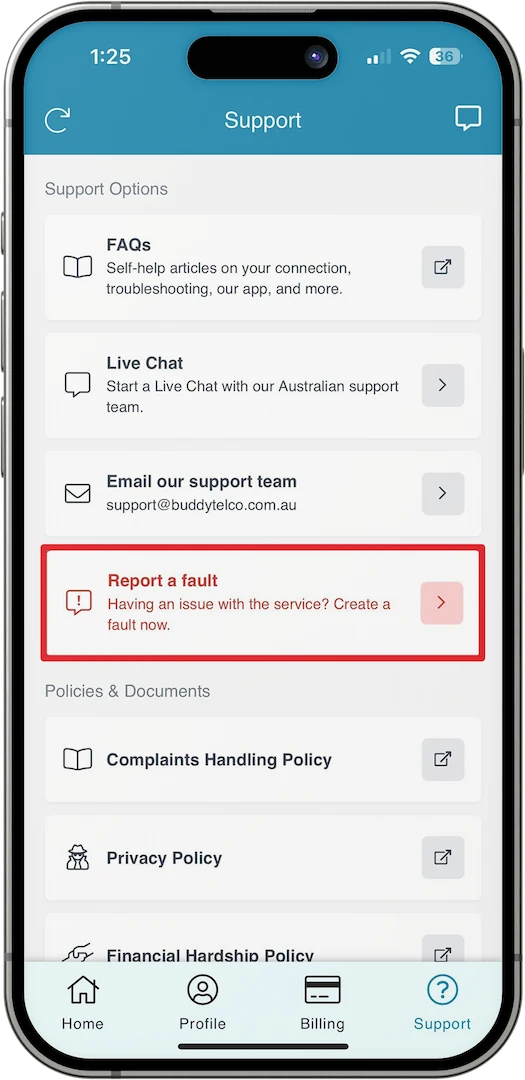
- Once you've selected Report a fault, the Buddy Telco app will automatically run a Self-Test. If it detects something's wrong, it'll let you know that there's an issue, and ask you to add some notes before raising a fault with us.
- Once you've raised the new fault, a member of our team will get in contact with you via the Buddy Telco app to help — make sure you keep an eye out for any updates!
Troubleshooting tests
Check Connection
This is for all connection types.
When to use it: if you're unable to connect to the internet or experiencing dropouts.
What it does: helps check your connection status from our end, identifying if your service is offline.
If the test fails, turn the power off on your NBN box for 30 seconds and then turn it back on. If your service doesn't use an NBN box, do this with your modem instead.
Report a fault if:
- Your result shows 'Not Connected'
- The 'Loopback Test' also fails after resetting your equipment
Kick Connection
This is for all connection types.
When to use it: if you're changing your modem or router. Use 'Kick Connection' before you unplug your current device and plug in the new one. Note: this will immediately disconnect your internet when used.
What it does: clears your connection with us, and not nbn®. Your service may take 10 minutes to reconnect following kicking.
Report a fault if: your service is not connecting after a 10-minute wait.
Loopback Test
This is for all connection types.
When to use it: if you're unable to connect to the internet or experiencing dropouts.
What it does: sends small amounts of data between you and NBN, confirming that data is getting through in both directions.
If the test fails, turn the power off your NBN box for 30 seconds and then turn it back on. If your service doesn't use an NBN box, do this with your modem instead.
Report a fault if: the test fails after you've reset your NBN box and your modem or router.
UNI-D Status
This test is for FTTP connections only.
When to use it: if you're unable to connect to the internet at all.
What it does: checks that your router is plugged into the correct UNI-D port on your NBN box. There are 4 ports, and only one should be active with your connection at Buddy.
Report a fault if: you've checked the cabling from your NBN box to the router and tried a spare ethernet cable if available.
NTD/NCD Status
This test is for FTTP, HFC and FTTC connections only.
When to use it: if you have no connection, or you're experiencing regular dropouts.
What it does: tells you the status of your NBN box, identifying dropouts (known as 'flaps') or if the connection is offline.
Report a fault if:
- The test fails.
- You've run at least two tests 24 hours apart where the second test shows an increased 'Flap Count' of at least 5.
For example, if you've run a test on Monday which shows 21 flaps, then tested again on Tuesday to see a result of 27 flaps, it's time to report a fault.
NTD/NCD Reset
This test is for HFC and FTTC connections only.
When to use it: if your 'NTD/NCD Status' test returns with an error. Your NTD/NCD is your NBN connection box.
What it does: resets your NBN connection box, forcing it to reboot itself.
Report a fault if:
- The NTD/NCD Status test is reporting a problem.
- You're still experiencing issues 10 minutes after your modem or router has reset.
Port Reset
This test is for FTTP, FTTC, and FTTN/B connections only.
When to use it: if your service is not in sync or is having low speeds.
What it does: resets the UNI-D port on your NBN box (FTTP, FTTC) or the port on your node (FTTN/B), allowing the modem to retry the connection.
Report a fault if: after the 'Port Reset', you've reset your modem or router, and are still experiencing issues after 10 minutes.
Line State
This test is for FTTN or FTTB connections only.
When to use it: if your service is running slowly or dropping out.
What it does: presents a 'Snapshot in time' of your line, with the NBN node seeing your connection in terms of its speed, stability, and line quality data.
Report a fault if:
- The result for 'Stability' is 'Risky' or 'Unstable' and you've run 'Stability Profile'. If it's 'Down' see 'Port Reset'.
- You're still having issues 48 hours after running 'Stability Profile'.
Stability Profile
This test is for FTTN or FTTB connections only.
When to use it: if the Line State test reports that your 'Stability' is 'Unstable'. This should be applied and kept on for 48 hours, before running a Line State test again.
What it does: changes the settings your modem uses, improving stability. This is usually effective when dealing with poor or degraded copper cabling.
Note: Applying the Stability Profile may reduce your speeds. Completing this test may be a prerequisite for having NBN investigate an Unstable service.
Report a fault if: you're still having issues after 48 hours.
DPU Status
This is for FTTC connections only.
When to use it: if you're unable to connect to the internet at all.
What it does: this test checks that the NBN equipment in the pit outside your property is online.
Report a fault if: the Status returns as 'Offline'.
DPU Port Status
This is for FTTC connections only.
When to use it: if you can't connect to the internet at all.
What it does: the test checks that the Port on the NBN equipment in the pit outside your property is receiving power from your NBN Box. This will also show the connected data rate.
Report a fault if:
- The Status is 'Offline', even after doing the DPU Port Reset test.
- The connected data rate is low after a DPU Port Reset.
DPU Port Reset
This is for FTTC connections only.
When to use it: if your DPU Port Status is “Offline” or showing a low Connected Data Rate.
What it does: resets the port on the NBN equipment in the pit that your NBN box connects to.
Report a fault if: after the 'DPU Port Reset', you've run the 'DPU Port Status' test, and the issues you're experiencing are unchanged.
-
Head to the 'Support' tab on the side or bottom taskbar and click on the Report a fault button. You can get to this from the 'Home' screen too, by selecting the arrow ( > ) next to the Faults option under the 'Tools' section.
The Buddy Telco app and portal allows you to view current or upcoming network outages. You can also receive these outage alerts through push notifications on your mobile device.
To do this, make sure you have push notifications turned on in your device settings.
To view outages in the app:
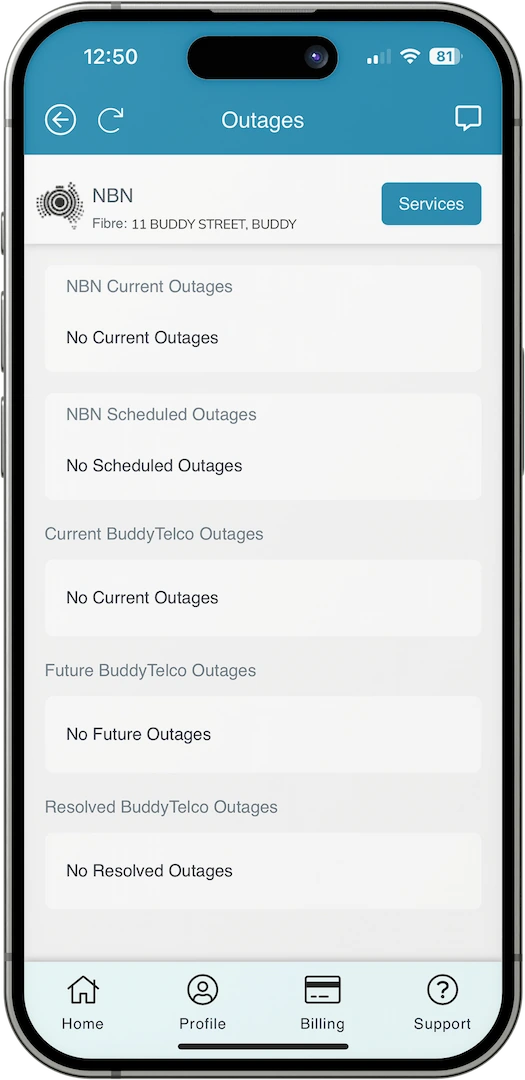
- From the 'Home' tab, scroll down to the 'Tools' section, and select the arrow ( > ) next to Outages.
- You can see all current or scheduled outages from both Buddy and NBN here.
Making changes to your internet plan in the Buddy Telco app is easy.
If you're unsure, here's how to do it with some screenshots to help you:
- Open the Buddy Telco app or portal and log in to your account. Once in, go to the 'Home' section (you may need to select the service you wish to change before you can view this page).
- Under 'Current Plan', click or tap on the arrow ( > ) next to your plan you'd like to change.
- You'll need to do a Two-Factor Authentication here, and you'll be prompted to receive and confirm a code to verify your identity.
-
Once authenticated, all available plan options for that service will be shown. Choose the speed and/or data you want to change to, with choice highlighted in blue when selected.
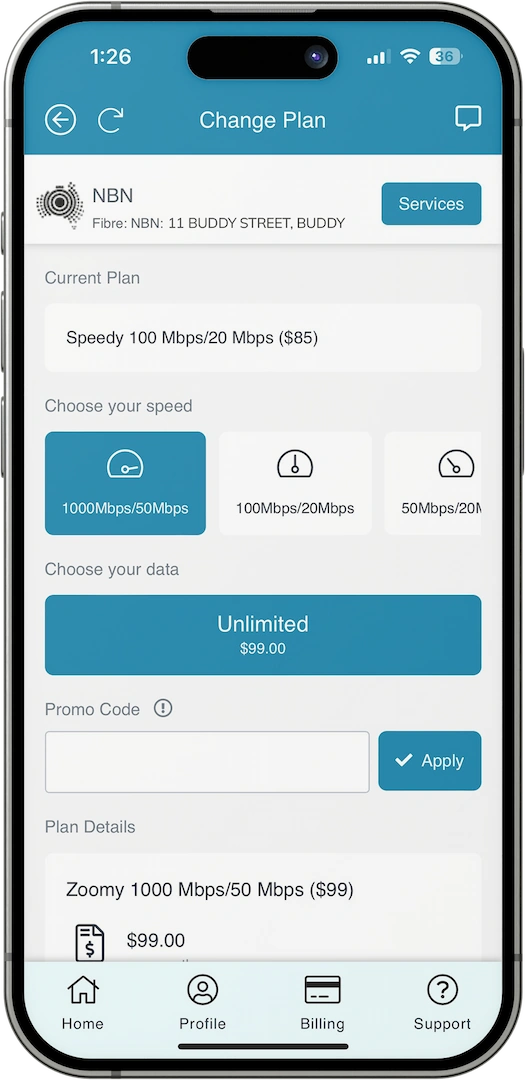 Got a promo code you're wanting to use? Apply it here by entering it into the Promo Code text field.
Note: Plan Change or Upsell promotions can only be applied when changing from a selected plan to an eligible higher plan using a valid code. Code must be accepted at the time of applying promo code. Please contact our Customer Service team on our website if you are having issues with applying a promo code,
- When you're happy with your choices, scroll down and double check your new plan details.
-
Still happy with them? Awesome! Scroll down to find two important options:
- Immediate plan change means you'll switch plans immediately when set to “YES”.
- Schedule on *date* means your plan will change at the start of your next billing cycle when set to YES.
- If everything is sorted, click Continue, and we'll handle the rest! You should receive a confirmation email notifying you of the plan change. It's a good opportunity to make sure the details look right!
Account details
Please note: The Primary contact and the Primary account owner cannot be modified via the Buddy Telco app or portal. This must be done formally using a 'Transfer of Ownership' form.
Download Transfer of Ownership form.
If you have extenuating circumstances or you are unable to complete these forms, speak to our Customer Service team on our website or app.
To edit an existing contact:
- On the Buddy Telco app or web portal, log in with your username and password. If you're unsure of your login details, you can select Forgot Username/Password to receive a prompt to update them.
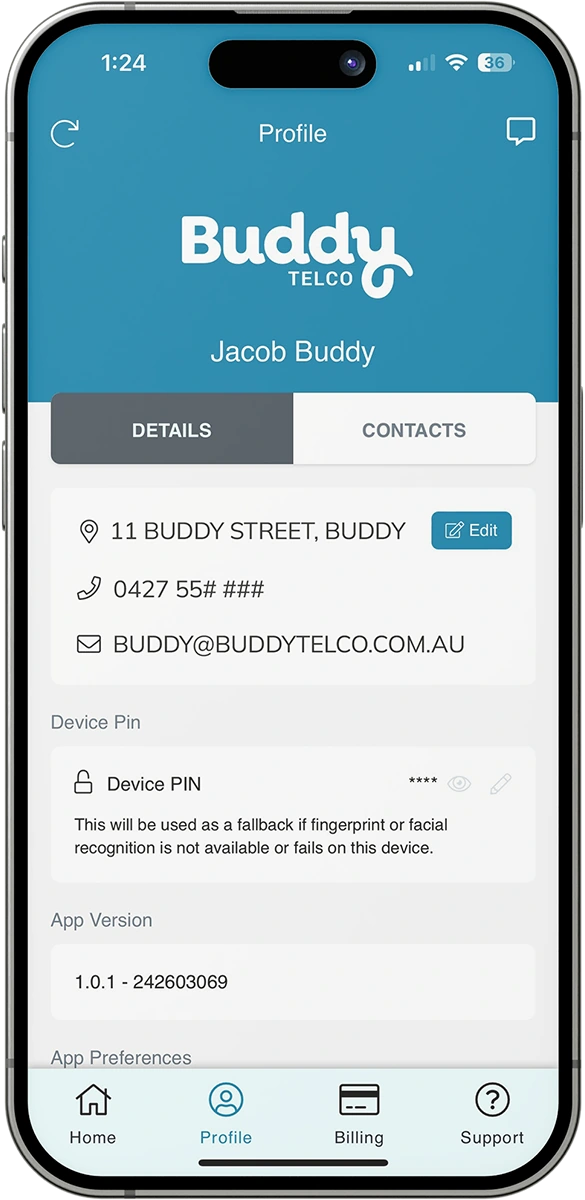
- Click or tap Profile in the side or bottom menu, then select Contacts.
- Click or tap on the Edit button in the top right corner of the details box.
- You'll need to do a Two-Factor Authentication here, and you'll be prompted to receive and confirm a code to verify your identity.
- Once authenticated, tap or click on the text fields to type in your updated details. When you're all done, double-check everything is correct, then click or tap Save Changes to save your changes.
To add a new authorised contact, repeat steps 1 and 2 above, and then:
- Scroll down and click or tap on Add an authorised contact.
- Complete your Two-Factor authentication again, entering the code you receive to confirm your identity.
- Once in, fill out all the required details, and add any optional details of the new contact.
- Double-check all the information is correct, then click or tap Save Changes> to finish.
Billing details
- On the Buddy Telco app or portal, log in with your username and password. If you're unsure of your login details, you can select Forgot Username/Password to receive a prompt to update them.
-
Go to the 'Billing' tab in the side or bottom menu of Buddy Telco app, then select Edit in the 'Payment Method' box.
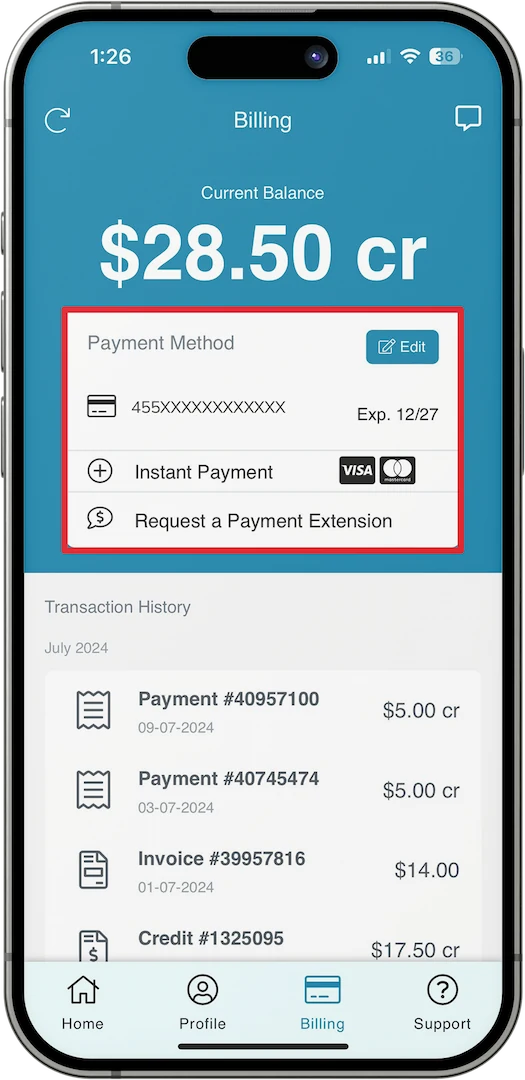
- You'll need to do a Two-Factor Authentication here, and you'll be prompted to receive and confirm a code to verify your identity.
- Once authenticated, choose your payment method either by selecting Update Credit Card to add a card, or filling in your Account Name, BSB and Account number to add a direct debit method.
- Double-check your details are correct, then tap or click Update to save your changes.
We understand that circumstances may mean you need to close your service with us. The Buddy Telco app allows you to do this.
-
From the 'Home' screen, scroll down and tap the arrow ( > ) next to Schedule a date to close the service in the 'Service Closure' section.
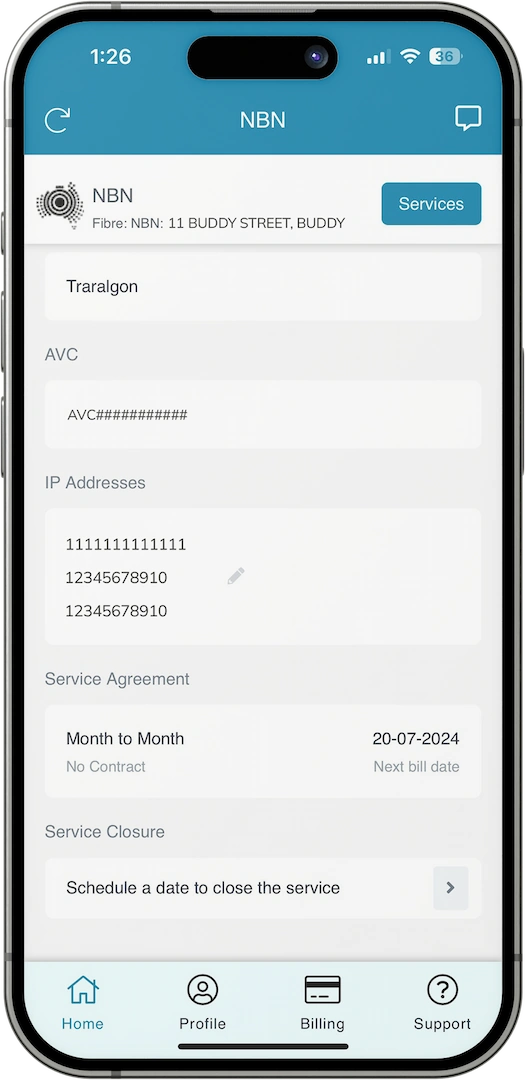
- You'll need to do a Two-Factor Authentication here, and you'll be prompted to receive and confirm a code to verify your identity.
- Once authenticated, enter the date you'd like your service switched off, and the reason for your closure.
- If everything is correct, select Continue and then Confirm to finish the process.
- You should now see a blue notification on your home screen of the scheduled closure date.
-
From the 'Home' screen, scroll down and tap the arrow ( > ) next to Schedule a date to close the service in the 'Service Closure' section.
Ran into an issue that needs some extra attention? It's easy to speak to one of our Australian-based team members via Live Chat in the Buddy Telco app or portal. Our team is available Monday to Friday, 11am-7pm (AEST).
To chat to us:
- In the top right-hand corner of the app or portal, select the speech bubble icon to open a new chat.
You can also access this in the 'Support' tab:
- Select the arrow ( > ) next to the Live Chat option under 'Support Options'.
Download the Buddy Telco App
You can download the Buddy Telco App on your platform of choice, or access the web portal right here in your browser.
Router Setup Guides
With buddy you have a choice to BYO (Bring Your Own) router, or you may purchase one of our compatible routers when signing up online. Note that your BYO router will need to be compatible with the NBN network, and depending on the age or capability of your device may impact your experience.
Guides to some of the most frequently used routers:
eero 6+
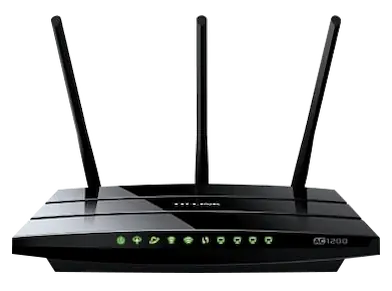
General router setup (Other)
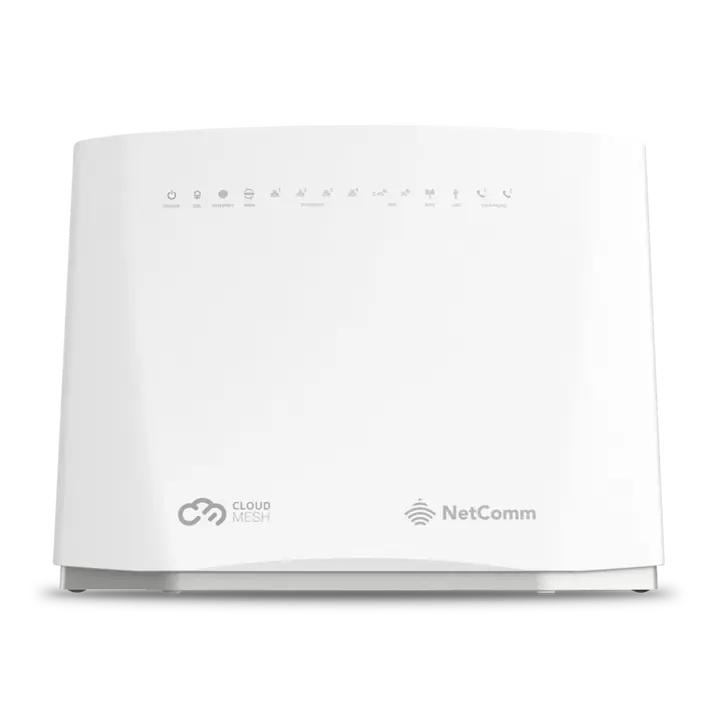
Netcomm NF20MESH
Telstra Smart Modem Gen 3
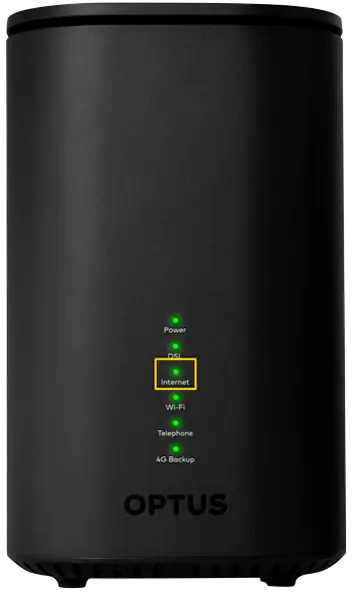
Optus Ultra Wi-Fi Gen 2
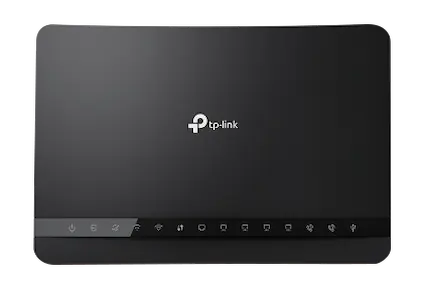
TP-Link VX220-G2V
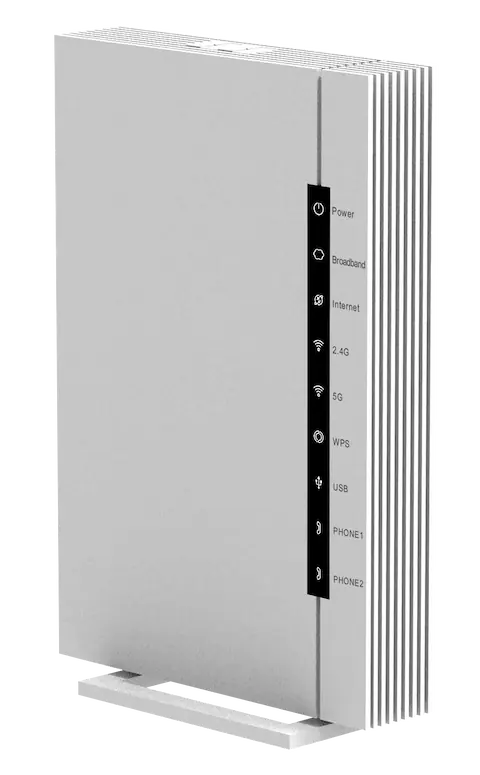
ZTE H1600
Belong 4353
Setting up the eero 6+ is simple — you'll just need a mobile phone with an internet connection.
-
Download the eero app on your phone.
- Log in with an Amazon account or create a new one.
- Plug one eero 6+ into a power point, then connect it to your NBN connection box (or VDSL2 modem if your connection type is FTTN or FTTB*) with an ethernet cable. The LED on the eero 6+ will start flashing white. This eero will become the primary device, then any other eero devices you may have will become 'satellite' devices. Any eero device can work as a satellite, even if it's not the same model.
- Tap Next in the eero app. The LED will flash blue, then turn solid blue as the app connects to the primary eero.
- Once the LED is solid blue, select a location for your eero. This will be how you can tell different eero devices apart from the app. At this stage the app may ask for the eero's serial number. This can be found under the barcode on the base marked by an 'S/N'.
- Next, set your Wi-FI network name and password for your other devices to connect with.
- If you only have one eero device, tap Finish setup. If you have other eero devices, tap add another eero device and proceed to step 8.
- To set up the 'satellite' eero devices, tap Next, and repeat steps 3, 4, 5, and 7 for each remaining device.
What do the lights on the eero 6+ mean?
A red LED indicates that the eero isn't connecting to the internet. If this happens, check the Buddy Telco app for outages and make sure the eero is properly connected to your modem or NBN box.
For explanations of all the lights on the eero, please visit eero's help centre.
-
If you don't have one of the above routers, here are some general steps to get you started. Alternatively, you can search “[Your device name] setup instructions” to find the manufacturer's guide.
-
Log in to your router.
There should be a sticker on your router with the IP address you need to log in to your router. For more information, check the router manufacturer's website.
-
For Fibre to the Node (FTTN) or Fibre to the Building (FTTB) customers, use the following settings:
- DSL Mode/Interface Type: VDSL
- Internet Connection Type: Dynamic or IPOE or DHCP
- No VLAN ID
- Obtain IP Address Automatically
- Enable SRA (where applicable)
- No, my ISP does not require a username and password (where applicable)
- Internet Provider (or ISP): Not Listed or Other (where applicable)
- DSL Mode/Interface Type: Ethernet WAN
- Internet Connection Type: Dynamic or IPOE or DHCP
- No VLAN ID
- Obtain IP Address Automatically
- Operation Mode: Wireless Router Mode (where applicable)
- Leave any other settings not mentioned here as default.
- Confirm and apply the changed settings.
- Turn your hardware off and on again, then test your connection.
If you're still having issues, please refer to your router manufacturer's support page.
-
Log in to your router.
- Make sure your Netcomm is plugged into a power outlet and switched on.
-
FTTC, FTTP, and HFC connections: run an ethernet cable from the red 'WAN' port to the correct port on your NBN connection box:
- FTTP: the UNI-D port as described in your onboarding email.
- FTTC: the 'GATEWAY' port.
- HFC: the 'UNI-D1' port.
- Connect your computer to the Wi-Fi network of the Netcomm device. You can find the Wi-Fi name and password on the sticker on the bottom of the device.
- Open a web browser like Google Chrome or Firefox. Enter the code 192.168.20.1 in the web address bar and press enter.
- A login page will appear. Enter the username and password on the sticker of the Netcomm device. This is different to the Wi-Fi name and password.
- Click on RUN QUICK START WIZARD at the top of the page.
-
Select the following settings:
For FTTC, FTTP, and HFC connections:
- INTERNET SERVICE: Ethernet WAN
- CONNECTION TYPE: Dynamic IP
- Leave the others as they are.
For FTTN and FTTB connections:
- INTERNET SERVICE: VDSL
- CONNECTION TYPE: Dynamic IP
- Leave the others as they are.
- Select Next.
- Here, you can change the optional settings like the Wi-Fi password or time zone. Otherwise select Next until your reach the 'SUMMARY' page.
- Select Finish.
- Check for an internet connection.
- Make sure that your Smart Modem is plugged into a power outlet and switched on.
- Look for the sim card slot in the back of the Smart Modem and remove the sim card if you find one.
-
FTTC, FTTP, and HFC connections: run an ethernet cable from the red WAN port to the correct port on your NBN connection box:
- FTTP: the UNI-D port as described in your onboarding email.
- FTTC: the 'GATEWAY' port.
- HFC: the 'UNI-D1' port.
- Put a pin or toothpick in the small 'RESET' hole in the back of the Smart Modem for 10 seconds.
- Wait for the Smart Modem to reset. This can take up to 15 minutes.
- Connect to the Smart Modem's Wi-Fi network. The Wi-Fi name and password will be on the sticker on the base of the Smart Modem.
- Check for an internet connection.
- Make sure that your Optus Ultra Wi-Fi is plugged into a power outlet and switched on.
- Look for the sim card slot in the back of the Optus Ultra Wi-Fi and remove the sim card if you find one.
-
FTTC, FTTP, and HFC connections: run an ethernet cable from the red WAN port to the correct port on your NBN connection box:
- FTTP: the UNI-D port as described in your onboarding email.
- FTTC: the 'GATEWAY' port.
- HFC: the 'UNI-D1' port.
- Put a pin or toothpick in the small 'RESET' hole in the back of the Optus Ultra Wi-Fi for 10 seconds.
- Wait for the Optus Ultra Wi-Fi to reset. This can take up to 15 minutes.
- Connect to the Optus modem's Wi-Fi network. The Wi-Fi name and password will be on the sticker on the base of the Optus modem.
- Check for an internet connection.
- Make sure that your TP-Link device is plugged into a power outlet and switched on.
-
FTTC, FTTP, and HFC connections: run an ethernet cable from the blue 'WAN' port on your TP-Link to the correct port on your NBN connection box:
- FTTP: the UNI-D port as described in your onboarding email.
- FTTC: the 'GATEWAY' port.
- HFC: the 'UNI-D1' port.
- Put a pin or toothpick in the small 'RESET' hole in the back of the TP-Link for 10 seconds and wait for it to reset. This can take a few minutes.
- Connect to the TP-Link's Wi-Fi network. The Wi-Fi name and password will be on the sticker on the back of the TP-Link.
- Open a web browser like Google Chrome or Firefox. Enter the code 192.168.1.1 in the web address bar and press enter.
- A login page will appear. Enter the username and password on the sticker of the TP-Link. This is different to the Wi-Fi name and password.
- Select Advanced at the top of the page.
- Select Network located in the menu at the left of the page.
-
For FTTC, FTTP, and HFC connections:
- Select EWAN.
- Click Delete All at the right side of the page. Then click Add.
- Internet Connection type: Dynamic IP
- VLAN ID: Leave unticked so it is not enabled.
- IPv4: Make sure this is ticked.
- MAC Clone: Do not clone MAC address
- Leave the others as they are.
- Select DSL/WAN.
- Click Delete All at the right side of the page. Then click Add.
- DSL Modulation Type: VDSL
- VLAN ID: Leave unticked so it is not enabled.
- Internet Connection type: Dynamic IP
- IPv4: Make sure this is ticked.
- MAC Clone: Do not clone MAC address
- Leave the others as they are.
- Click Save or Apply.
- Check for an internet connection.
If you're still having issues please refer to the official TP-Link support page.
- Make sure your ZTE is plugged into a power outlet and switched on.
-
FTTC, FTTP, and HFC connections: run an ethernet cable from the red 'WAN' port to the correct port on your NBN connection box:
- FTTP: the UNI-D port as described in your onboarding email.
- FTTC: the GATEWAY port.
- HFC: the 'UNI-D1' port.
- Connect your computer to the Wi-Fi network of the ZTE. You can find the Wi-Fi name and password on the sticker on the ZTE's base.
- Open a web browser like Google Chrome or Firefox. Enter the code 192.168.20.1 in the web address bar and press enter.
- A login page will appear. Enter the username and password on the sticker found on the ZTE. This is different to the Wi-Fi name and password.
- Click Internet at the top of the page.
-
Click WAN at the menu on the left side of the page.
For FTTC, FTTP, and HFC connections:
- Click DSL in the menu bar that appears below the 'Internet' button.
- Click the rubbish bin icon next to each of the DSL connections.
- Click Ethernet in the menu bar that appears below the 'Internet' button.
- Click the rubbish bin icon next to each of the Ethernet connections.
- Click Create New Item.
For FTTN and FTTB connections:
- Click Ethernet in the menu bar that appears below the 'Internet' button.
- Click the rubbish bin icon next to each of the Ethernet connections.
- Click DSL in the menu bar that appears below the 'Internet' button.
- Click the rubbish bin icon next to each of the DSL connections.
- Click Create New Item.
-
Select the following settings:
- Connection Name: Type in 'Buddy Telco'.
- Type: Routing
- Service List: Internet
- Link Type: IP
- IP Version: IPv4
- IP Type: DHCP
- NAT: On
- VLAN: Off
- Click Apply.
- Check for an internet connection.
If you're still having issues, please refer to the official ZTE support page.
- Make sure that your Belong 4353 is plugged into a power outlet and switched on.
-
FTTC, FTTP, and HFC connections: run an ethernet cable from the red WAN port to the correct port on your NBN connection box:
- FTTP: the UNI-D port as described in your onboarding email.
- FTTC: the 'GATEWAY' port.
- HFC: the 'UNI-D1' port.
Put a pin or toothpick in the small 'RESET' hole in the back of the Belong for 10 seconds.
Wait for the Belong to reset. This can take a few minutes.
Connect to the Belong's Wi-Fi network. The Wi-Fi name and password will be on the sticker on its base.
Check for an internet connection.
Still need help?
If we didn’t answer your question, our Australian-based live chat team might be able to help. You can start a chat in your web browser, or in the Buddy Telco app.


